subtalar joint anatomy
Figure 1 from Medial approach to the subtalar joint: anatomy we have 17 Images about Figure 1 from Medial approach to the subtalar joint: anatomy like Figure 1 from Medial approach to the subtalar joint: anatomy, Figure 5 from Medial approach to the subtalar joint: anatomy and also Anatomy of ankle joint. Here you go:
Figure 1 From Medial Approach To The Subtalar Joint: Anatomy
 www.semanticscholar.org
approach subtalar medial indications
Arthrodesis Of The Tarsometatarsal Joint | Musculoskeletal Key
 musculoskeletalkey.com
joint tarsometatarsal arthrodesis
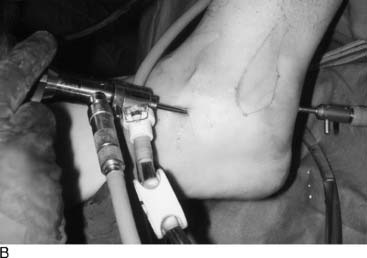
Dr Steven Sampson Demonstrates Ultrasound Guided Knee Injection - YouTube
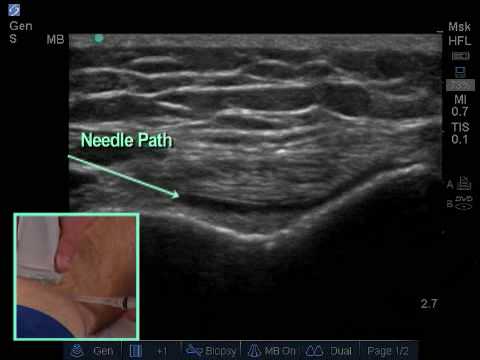 www.youtube.com
ultrasound knee injection guided musculoskeletal using radiology radiologic technology
Posterior Impingement Or Achilles Pain | The Injury Clinic
 www.theinjuryclinic.com.au
posterior tendons anatomie crural talon achilles tendon douleur physiology impingement medial otot dorsale tibial ferne nerves ligament cheville samanda soleus
Figure 5 From Medial Approach To The Subtalar Joint: Anatomy
 www.semanticscholar.org
subtalar joint medial approach
Subtalar Joint Pathology | Musculoskeletal Key
 musculoskeletalkey.com
subtalar trigonum os joint ray pathology left ankle lateral figure
-Normal Soft-tissue Anatomy. A, Posterior Subtalar Joint And Ankle
 www.researchgate.net
subtalar posterior coronal medial
Arthroscopic Ankle And Subtalar Arthrodesis – Indications And Surgical
 www.intechopen.com
arthrodesis subtalar ankle arthroscopic intechopen figure arthroscopy
Disorders Of The Subtalar Joint, Including Subtalar Sprains And Tarsal
 musculoskeletalkey.com
subtalar joint portal working arthroscopic examination posterior anterior figure
45 Calcaneus Fractures | Musculoskeletal Key
 musculoskeletalkey.com
calcaneus anatomy calcaneal fractures axial subtalar facet
PPT - Foot And Ankle Anatomy And Biomechanics PowerPoint Presentation
 www.slideserve.com
biomechanics presentation supination pronation
Anatomy Summary Test Flashcards | Quizlet
 quizlet.com
gait walking joints anatomy joint foot summary test biomechanics during quizlet ankle normal
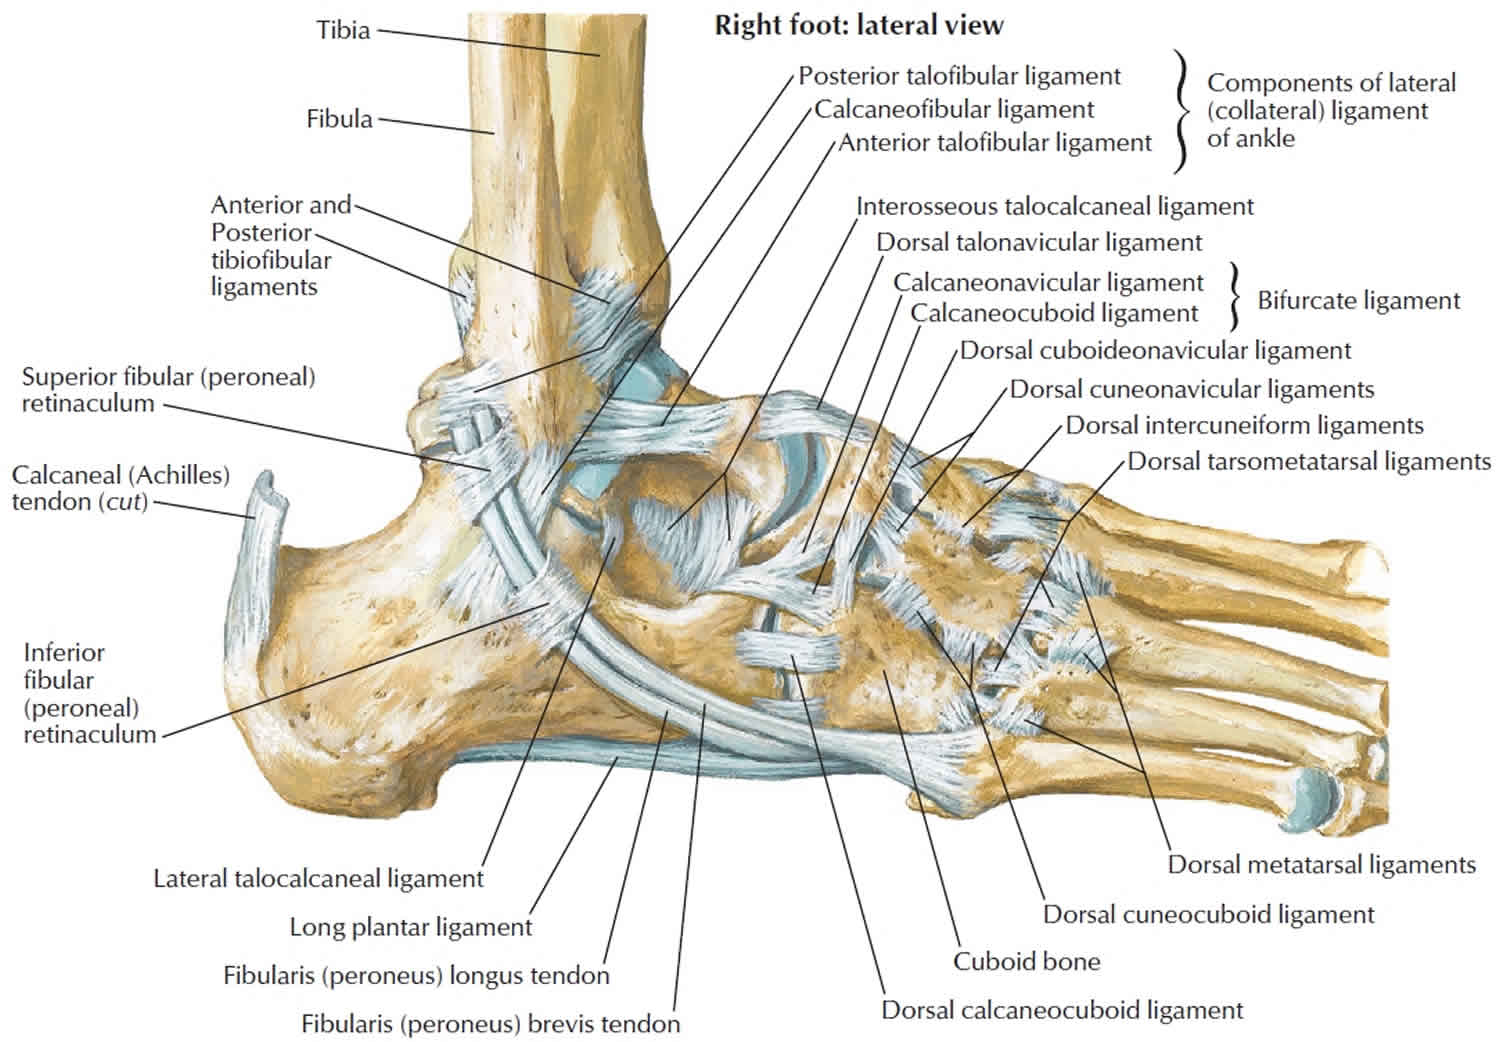
Anatomy Of Ankle Joint
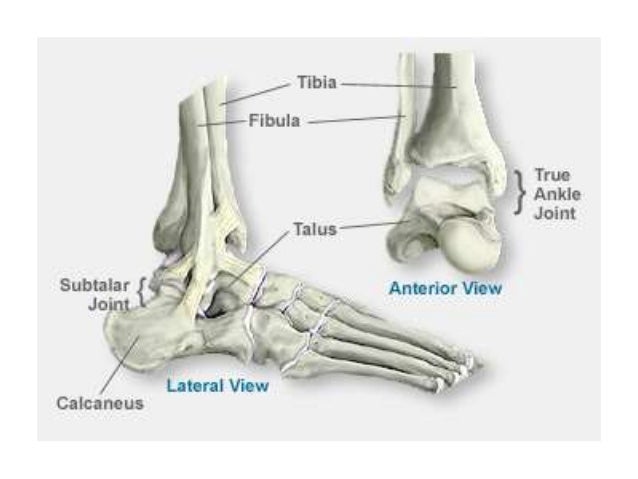 www.slideshare.net
ankle
Occult Isolated Articular Branch Cyst Of The Lateral Plantar Nerve
 www.jfas.org
cyst lateral plantar nerve articular fig ganglion ankle joint foot occult branch isolated jfas
Disorders Of The Subtalar Joint, Including Subtalar Sprains And Tarsal
 musculoskeletalkey.com
subtalar joint tarsal disorders sprains coalitions including anatomy figure
Level 8 - Ankle And Foot - Limb Anatomy - Memrise
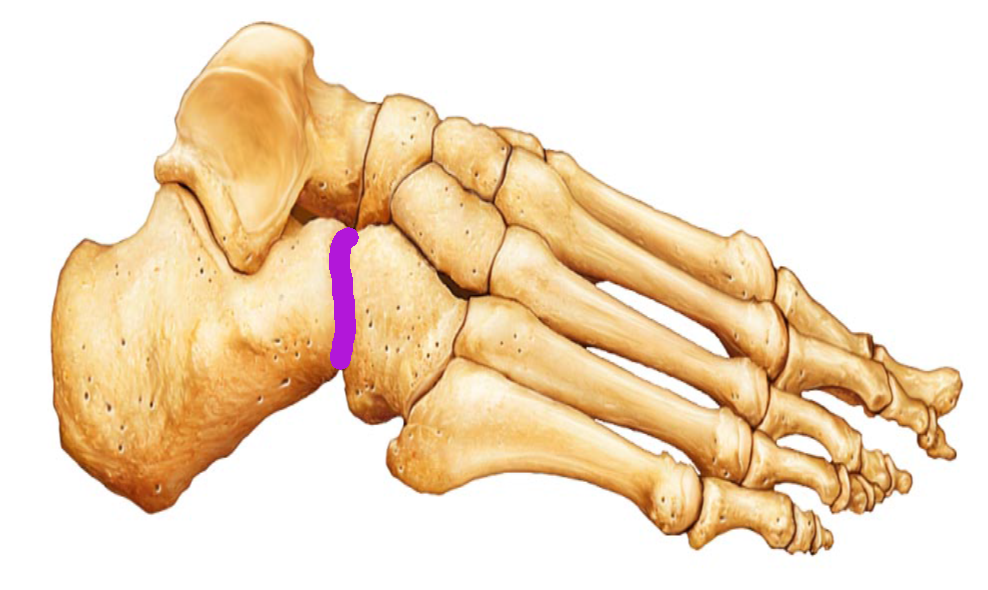 www.memrise.com
anatomy limb calcaneocuboid joint memrise foot
Calcaneus Bone Anatomy, Function, Calcaneus Pain & Calcaneus Fracture
 healthjade.net
calcaneus ligament ligaments tendons joint healthjade talus fracture
Posterior tendons anatomie crural talon achilles tendon douleur physiology impingement medial otot dorsale tibial ferne nerves ligament cheville samanda soleus. Joint tarsometatarsal arthrodesis. Subtalar joint pathology